Please note this Help Article this only applies to one-off purchases. Subscribers will have access to all routes in a given region and do not need to purchase individual routes.
When purchasing a new route, you'll be redirected to a 'Thank You' page. Following all route purchases, an email is sent with instructions that we'll include below (these emails end up in the spam folder for certain email service providers).
After purchasing the route, simply go back back to the Route Guide Page. For example, if you purchased the Lost Coast 4x4 Trail go back to the Route Guide -->

 www.overlandtrailguides.com
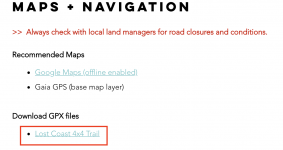
Next, scroll down to the Maps and Navigation section and click the link for the download page. As long as you're signed in with the same email that was used to purchase the route, you'll be able to access the download page.

When purchasing a new route, you'll be redirected to a 'Thank You' page. Following all route purchases, an email is sent with instructions that we'll include below (these emails end up in the spam folder for certain email service providers).
After purchasing the route, simply go back back to the Route Guide Page. For example, if you purchased the Lost Coast 4x4 Trail go back to the Route Guide -->

Lost Coast 4x4 Trail | Route Guide, Maps, GPX files
With its redwood forests, spectacular mountains, and rugged coastline, the Lost Coast might just be the quintessential NorCal adventure!
 www.overlandtrailguides.com
Next, scroll down to the Maps and Navigation section and click the link for the download page. As long as you're signed in with the same email that was used to purchase the route, you'll be able to access the download page.


